STAMP SCHOOL 101: IV
Embossing:
Tools, Heat, Dry & Dies
Emboss
-to raise in relief
-to decorate a surface with a raised ornament
-to raise a design with dies, of a similar kind; one negative of the other to raise a design on (a blank) with dies of a similar pattern; one the negative of the other
-to cause to bulge out; make protuberant
When anyone mentions they have a project they embossed I think immediately "What a lot of mess!" For some reason, unbeknownst to me, embossing powder is almost as bad as glitter. Glitter and I are enemies. At least I don´t find embossing powder on my dog´s back or my husband´s forehead three days later!!
Tool embossing
Many may be familiar with a stylus as a tool to score with. It has a ball on each end, one smaller than the other. Putting your 8-1/2"x 5-1/2" piece of paper on a scoreboard or your trimmer and using the stylus to mark it in half. This helps to fold the cardstock.
 |
Fiskars Dual-tip Embossing Stylus |
Actually, a stylus was the first tool crafters used to emboss! They used it to break the fibers down in cardstock by gently rubbing over and over in the same place.
Draw a 5 petal flower on a piece of 80# cardstock. Working on a rubber mat or mouse pad, use the large end and follow each petal of the simple flower. Use the large end and follow it around 3 times. Then change to the small end. Follow the groove a couple times. Remember to only stay in the groove.
 |
| Stylus and Paper |
Now, turn the paper over. You can see the flower on the other side. Using the large end, slowly, gently, create a line around the flower next to the one you created on the other side. Anyone familiar with making paper flower embellishments recognizes this process as the one used to form petals and leaves.
As the paper is worked from either side, an image is created much like that of an old tin ceiling tile from the 1800s or an urn from the 800s. Embossing has been done for centuries.
 |
| Finely detailed embossing |
 |
| Embossed ceiling tiles |
Some of the first embossing incorporated into the crafting world came in the form of metal stencils. Paper put over the stencil and held to a light source allowing the stencil design to be seen. Pressing in the open areas would then leave an image. Some still use this practice today.
 |
| Metal Stencil, lightbox and stylus |
 |
Aleks Melnyk 32 Bullet Journal Stencil |
Heat embossing
Heat embossing is an awesome way to add texture and dimension to your projects! No matter how many times I have added this technique to my projects, I still get excited when the embossing powder starts to melt! It's like magic!
Heat embossing is a technique that allows raised elements on your paper crafts. Embossed images are created by stamping or drawing onto your cardstock with a long drying ink. A special powder is applied and melts when heated.
 |
| Adding embossing powder to Versafine sentiment. Excess powder will fall into a coffee filter |

The extra powder gets emptied back into the container.
TIP: Putting the clear embossing powder into a larger container
from the original small bottle makes it easier to work with.
There aren't many supplies needed to heat emboss. The most important tool being the heat gun. This cylinder shape tool blows extremely hot air directly to the area. It only takes a few seconds to heat. A hair dryer cannot be used. It blows too hard and does not get hot enough.
 |
| Heat Embossing tool |
Another item is the ink you will use. The most common is Tsukineko's Versamark Watermark Pigment Ink. This ink is very sticky and slow drying and it holds embossing powder wonderfully! Other inks are Versafine Onyx Black Pigment Ink and Distress Oxides. Even though they are dye inks which dry faster, Distress Oxides stay wet a little longer and grasps the powder.
 |
| Embossable Inks |
 |
| Versamark Watermark clear Ink |
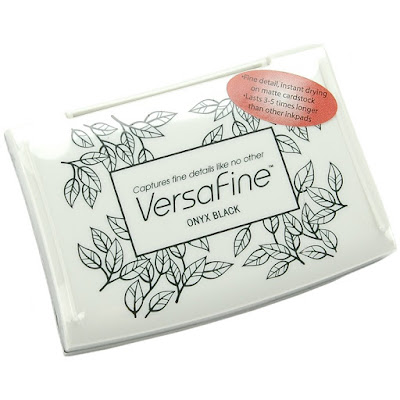 |
| Versafine Onyx Black Pigment Ink |
| Ranger Embossing Powder Super Fine Clear |
Click below to watch a video by Jen Evers for Koala T Crafts. She explains the Embossing process plus a few extras!
 |
| All about wet or powder embossing! Different ways to use your embossing powders! |
 |
| Additional Tools |
Some additional Tools to consider;
1. Anti-static powder tool
 |
|
2. Glitter tray or coffee filters- for collecting the unused powder and to put it back in it's container.
3. Small Paintbrush- to remove stray embossing powder from hard to reach areas.
4. Tweezers and Heat resistant surface- to keep your fingers safe.
| Reverse Tweezers with pad for heat protection |
 |
| Heat Resistant Nonskid Craft Mat |
5. Embossing pens and markers- same ink as the pads and gives you the ability to draw and write.
 |
Dry embossing
Embossing folders are made of hard plastic, which has a front and a back side with a design imprinted on the inside. When closed the design fits together. This will leave an impression on your paper when its placed inside the folder and rolled through a die cutter. The same rollers that push your paper and die through are the same that will emboss your paper.
 |
| Unembossed paper placed inside the folder |
 | |
| Embossed paper after being rolled through a Big Shot |
Die Cut Embossing
This is a neat trick! It depends on which die cut/emboss machine you own as to which plates (or sandwich) you will need for this. The Big Shot takes Tab 1. cutting plate, SILICONE MAT, die side up, paper, cutting plate.
 |
| Die-cut embossed ´hello´ |
This last embossing technique is so simple and yet amazing! Sentiments, an outline of florals that can be colored, no masking needed, are all possibilities with this technique. Work with it, play with it! Use the tools that you have and see what you can come up with!
I added a couple videos from the Jen Evers YouTube Channel Archives. There are hundreds of videos stored for Koala T Crafts. Many techniques and lots of DIYs and information! I am providing the link below:
You are personally invited to watch Koala T Crafts LIVE on the YouTube Channel on Wednesday for One in Ten by Jen: from Mailbox to Masterpiece at 5 pm CST. This program is so popular! Viewers enjoy and get a chance to participate! Not only can you chat with the community and Jen but you can send in your scraps and Jen will attempt to make you a card in 10 minutes! She DARES you to stump her!
Then on Fridays at 5 pm CST Koala T Crafts presents Friday Free Play with Jen LIVE! She shows crafting tips and tricks as well as teaching techniques. Viewers can offer ideas and sometimes the show goes a different direction than planned. That's what Free Play is all about!! Having fun while crafting!
Then on every other Saturday from 10 am-2 pm, Koala T Crafts has been offering a Garage Sale for the Facebook Community and the Public!! This too is a LIVE event! You will find discounted prices on tools, stamps, embellishments, markers, Tim Holtz, Stampin´ Up, Close To My Heart, Jolees, Fiskars, and so much more! If you ever have any questions about the events:
Wait! There's MORE!
Patrons have had the chance to get specials or preview sales on the Friday evening before the Garage Sale. After Friday Free Play at 6 pm CST, Patrons, only on the Patron Facebook page, get to view and participate.
How can you get into this sale? It's oh, so easy! Becoming a Patron means making a monthly, or one time pledge, for as little as a $1.00. You are able to access special videos, additional swaps and challenges like the Envelope Challenge, Sketch Challenge, and receive free monthly digital stamps! Just come in your pajama pants, hang out, bring a friend and have fun! Your support helps Jen continue her tutorials! It's easy to sign up with Patreon!
As always, thank you so very much for the continued support of the Jen Evers YouTube Channel! She has hit over 15,000 subscribers! Thank you for supporting and caring about the Koala T Crafts Facebook Group, Patreon Group, and the Blog! Please remember that you can always ask questions;
Artistically yours,


I would like to thank:
1. On the Facebook page, many in the Community are willing to help you out!
2. Private Message (PM) Jen Evers (Admin.) or Penny Jo Ratcliff (Admin.), Lori Ellen (Blog), Pamela Wilber (Card Swaps) or Susan Baker (Moderator)
3. If you are a Patron of Koala T Crafts, you can post your question and the Patron Community will help happily!
4. Jen Evers is always available at her email address: koalatcrafts@gmail.com.
Remember, great things happen to
those that create!
Artistically yours,


 |
| Koala T Crafts Store Jen's Amazon Recommendations Facebook Access Patron Access Koala T Crafts Blog koalatcrafts.com |
https://www.youtube.com/watch?v=bfsutdh4aaI
https://www.craftsy.com/paper-crafts/article/how-to-heat-emboss/
https://www.jennifermcguireink.com/2018/06/creative-uses-of-embossing-folders.html
https://pixabay.com/en/