FOLLOW ME HERE!

Tuesday, November 27, 2018

TIM HOLTZ HOLIDAY HACKING

Tim Holtz & Holiday Hacks

Yes! The HOLIDAYS are here! I've been making holiday cards since September when school began. But there is just something magical about making holiday projects during the season. They seem to sparkle more. Everything seems magical!

Tim Holtz feels the same way. He is always so jovial on his videos. (He has a gleaming smile!) But at this time of the year, he literally sweats glitter! Well, he has come up with some easy hacks to help you sparkle up everything and save time doing it!

Part I

Tags made from Ideology Quote Chips and some string is an easy way to dress up a gift package! Just punch a hole through the sturdy chipboard and set an eyelet. You don't have to add an eyelet although it is a way to dress up the tag!


Trinket tags are a great way to use up some of your scraps and embellishments. Using Ideology Tag Press Rings, a Charm and a Loop Pin make easy tags to dress up your "brown paper packages tied up with strings! (Hint: Make in bulk at one time to save time later!)


Using Shifters to stencil shipping tags is also an easy way to decorate packages. There is usually difficulty holding paper and stencils still at the same time. Using washi tape helps but it leaves a blank edge when removed. 


Sizzix has a product called Sticky Grid that was designed to hold dies in position when going through a Die Cutting Machine. It has adhesive on both sides. Much like Post-It Notes, it can be used over and over again and then returned to the backing sheets for use another time. 


Sticky Grid 6" x 8.5" (5PK)


Tim goes through several other hacks, ways to help you make time for those holiday project ideas. Watch the video by clicking on the picture.

Tim Holtz Holiday Hacks Part 1

Part II

Now Tim has ideas for decorations and gift giving. He shares ways to add sparkle to everything HOLIDAY!

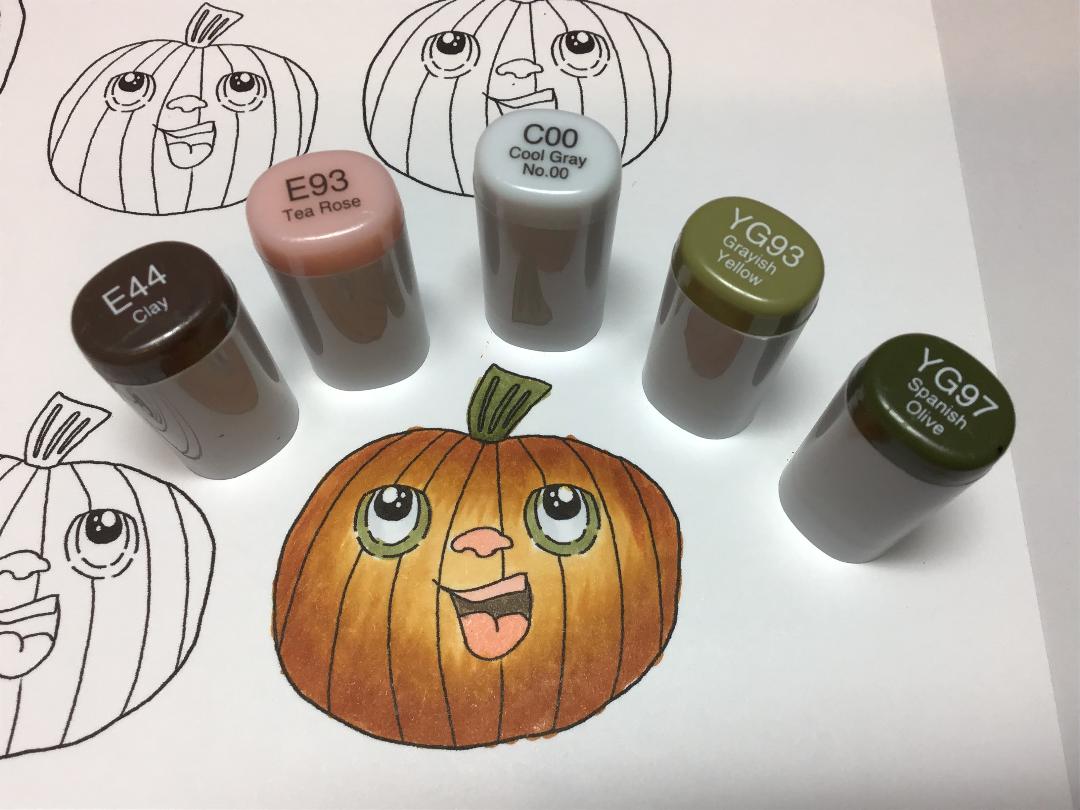
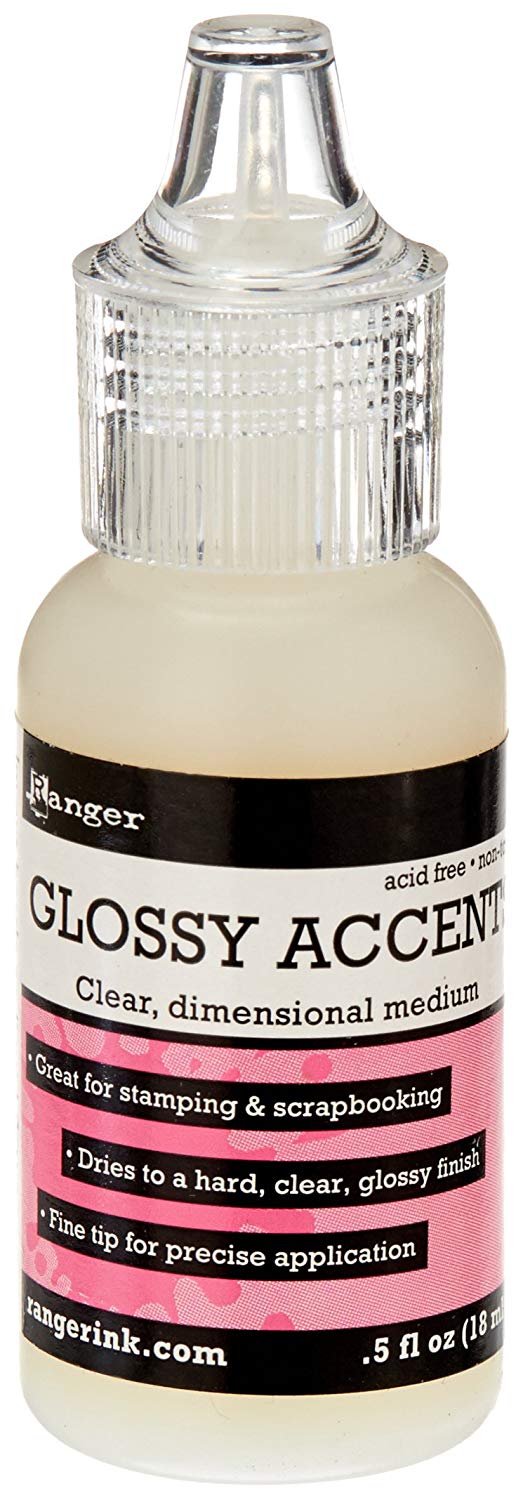
Make your trinkets shine in the light by adding Ranger Alcohol Inks to the smooth surfaces. When dry, brush with Distress Collage Medium and add Rock Candy Glitter with the NEW Glitter Duster! Arrange nature inspired die cuts and a bow made of twine atop your gifts. 


Turn Rock Candy Glitter into many different colors to add sparkle to your stamped cards and tags!


Use your die cuts like Sizzix FRESH BAKED 1 & 2 Thinlits to make gift cards that are as cute as gingerbread cookies!


Surprise your holiday guests with standing cardstock die cuts by using a fancy fold and any steel rule die.


Find other surprises, tips, and tricks in Holiday Hacks: Part 2! 

Stampers Anonymous stamp set Festive Overlay helps to create beautiful holiday cards and tags swiftly. Tim's tip: Have everything ready in assembly-line fashion. Doing that will aid in using your time efficiently. 


Festive Overlay stamp set was created specifically with the idea of stamping the sentiment over the image. All of the sentiments work with all of the images.

In the video, Tim talks about what type of inks to use and whether one type of ink stamps better on another. In some cases, it boils down to personal preference.


Watch Part 2 by clicking on the picture below.

Holiday Hacks: Part II


I've been so busy making cards for others that I haven't started on my own. There are a couple ideas in these videos that have inspired me to get going on them! I hope you feel inspired too!

I know of another thing to help inspire you and get those creative juices flowing! Watch Koala T Crafts on Wednesdays at 5 pm CST for One in Ten with Jen: In´Jen´uity from Mailbox to Masterpiece and Fridays for Friday Free Play at 5 pm CST. There are special sales and events posted in the Facebook groups for Patrons and Garage Sales usually every other Saturday from 10 am-2 pm CST. Join our Facebook Group to stay updated on events. We hope you will join us!

Koala T Crafts FaceBook Group

Remember, great things come to those that create!


Artistically Yours,

As always, thank you so very much for the support of the Jen Evers YouTube Channel! She has hit over 15,000 subscribers! Thank you for supporting and caring about the Koala T Crafts Facebook Group, Patreon Group, and the Blog! Please remember that you can always ask questions;

1. On the Facebook page, many in the Community are willing to help you out! 
2.  Private Message (PM) Jen Evers (Admin.) or Penny Jo Ratcliff (Admin.), Lori Ellen (Blog), Pamela Wilber (Card Swaps) or Susan Baker (Moderator)
3.  If you are a Patron of Koala T Crafts, you can post your question and the Patron Community will help happily! 
4.  Jen Evers is always available at her email address: koalatcrafts@gmail.com 

Becoming a Patron is so easy and fun!

What is a Patron?

When you make a monthly, or one-time pledge, for as little as a $1.00, you are able to access special videos, additional swaps and challenges like the Envelope Challenge, Sketch Challenge, receive free monthly digital stamps and get a free preview of the crafty items that will be for sale at Koala T Crafts bi-weekly Garage Sales. Just come in your pajamas, hang out and have fun! Your support helps Jen continue her tutorials! Sign up with Patreon!


All things Koala T Crafts


Many thanks to:
Tim Holtz blog  http://timholtz.com/2018-holiday-hacks/ 
Simon Says Stamp  simonsaysstamp.com
Scrapbook.com
Amazon.com


Saturday, November 24, 2018

HOW TO : STAMP LAYERING

STAMP SCHOOL 101: V

Stamp Layering
Stamp layering is an amazing way to easily create realistic looking florals and other objects such as deer, cardinal, hummingbird, flamingo, goldfish, trees, and even an octopus. These unique stamps give you the ability to create masterpieces with very little effort! 

Matching Each Layer

Some companies now show grouped stamps, numbered order, pictured diagrams and even markings such as a small dot to match up not only the stamps but the dies as well! This makes it a much easier task than turning the image around and around hoping you will find the right place. 


Layered floral groups that have been
 circled on the plastic protection sheet

Layering guide on the back of the package. 

A thin clear acrylic block can be used on the layering. Once you know the matching point, it will be easier to see through a thinner block. 

One other tool you may consider using would be a stamp platform of some kind. There are so many on the market now, you should get the same results with any of them. I used my Misti to make some of the following prints. 


Misti Stamp Positioner 

This works best for me. It is a pricey item but one that can be used every time I stamp.  I can position the stamp exactly where I want it before I ink. If the image didn't stamp properly, without moving the stamp, it can be inked again and stamped in the exact spot. 

The Misti also makes it easy for me to use for multiples or to use at Make-n-Takes (Crops).
Everyone has their own way of doing what is most comfortable for them. Below you find an easy DIY (Do-It-Yourself) stamp positioner that is great for the beginner or to take on the go!

DIY Stamp Positioner


Stamping The Image

I decided just to make a rose to show you how it's done. Choose three shades of the same color of ink. 


A dye-based ink works very well with this type of stamping. (Distress Oxides do not look right when used. They have a chalky finish and the colors do not seem to blend on their own.) A dye-based ink will absorb into each other. There will not be harsh lines to see where one shade starts and another begins.

DETOUR: Inks
Just a side note, I happen to like a particular ink for this project though I have used many different kinds.

The one I like is most important to me because of certain properties:
-It's a water-based ink that dries right away
-It's a crisp image right away
-Color stays, some inks fade when they dry
-They can come in a collection of 4 from light to   darkest
-A collection takes the guesswork out of finding     the right colors
-They work well with other inks

Decide which properties are important to you before purchasing your inks.

Stamp Away!

Find and remove the set of stamps that create the image you desire. Set them in order on your craft mat starting from the first to the last. 

 Choose a color of ink that has several shades from light to dark. Ink the most solid stamp with the lightest ink. The next stamp will be a shade darker and have a little less definition. The third will not look like a flower at all! Some images come with a 4th layer and some come with an outline when the layers are done. 


When placing your stamp, look for an
edge that matches on each layer

Your next layer will be aligned at the pencil mark.

The second stamp layer

The third layer will be aligned in the same spot. This spot can be marked with a black Sharpie on each stamp to make it easier for next use.

Preparing for third layer

And the finished flower...

A peach peony on creme cardstock

Second Generation Stamping

An acrylic block must be used for this next technique. It's the same layering process but after you stamp the first time, stamp a second time near it. The second stamping of each layer creates a softer, lighter colored layer.

Second Generation stamping

Spotlight Stamping

Once your first flower is finished, use your lightest shade and your second layer and make extra prints randomly around your cardstock, making sure to leave room for your sentiment.

When I stamped my sentiment, I used the darkest shade I had and stamped right onto the cardstock. The sentiment can be any design you'd like. 

Now use it to make a beautiful card. You just finished the background paper and focal point all in one!


A stamp positioner helps to get a great alignment of images but so does a sharp eye and an acrylic block! Stamping layers is simple when you take your time. Don't fret about not lining up exactly and then throwing the paper away after one or two layers. Both of my cards had a layer that was not aligned!

Walk away from your card for a day. You'll see a masterpiece when you come back!

Remember to watch Koala T Crafts on Wednesdays at 5 pm CST for One in Ten with Jen: In´Jen´uity from Mailbox to Masterpiece and Fridays for Friday Free Play at 5 pm CST. There are special sales and events posted in the Facebook groups for Patrons and Garage Sales usually every other Saturday from 10 am-2 pm CST. Join our Facebook Group to stay updated on events. We hope you will join us!

Koala T Crafts Facebook Family

Remember, great things happen to
 those that create!

Artistically yours,


As always, thank you so very much for the support of the Jen Evers YouTube Channel! She has hit over 15,000 subscribers! Thank you for supporting and caring about the Koala T Crafts Facebook Group, Patreon Group, and the Blog! Please remember that you can always ask questions;
1. On the Facebook page, many in the Community are willing to help you out! 
2.  Private Message (PM) Jen Evers (Admin.) or Penny Jo Ratcliff (Admin.), Lori Ellen (Blog), Pamela Wilber (Card Swaps) or Susan Baker (Moderator)
3.  If you are a Patron of Koala T Crafts, you can post your question and the Patron Community will help happily! 
4.  Jen Evers is always available at her email address: koalatcrafts@gmail.com 

Becoming a Patron is so easy and fun!

What is a Patron?


When you make a monthly, or one-time pledge, for as little as a $1.00, you are able to access special videos, additional swaps and challenges like the Envelope Challenge, Sketch Challenge, receive free monthly digital stamps and get a free preview of the crafty items that will be for sale at Koala T Crafts bi-weekly Garage Sales. Just come in your pajamas, hang out and have fun! Your support helps Jen continue her tutorials! Sign up with Patreon!


For All Things Koala T Crafts


https://www.youtube.com/watch?v=rJI4UP9mEf8 Sprinkled with Glitter
https://www.youtube.com/watch?v=e4r8ujv4HmA Spotlight Stamp layering
https://www.youtube.com/watch?v=UwhYm9sN-FA&t=161s Second Generation Stamping

Monday, November 12, 2018

COLORING DIGI NOVEMBER PUMPKIN HEAD

Coloring Digi for November

Pumpkin Head

This little guy is cute! There are so many ways to create a card using Pumpkin Head! He is a perfect digital stamp for the month of November and the middle of fall!

Preparing to Color

It was decided to print out multiple sizes of Pumpkin Head. For the project, the sizes of 1 1/2", 1 3/4" and 2" diameters were chosen. 


The pattern paper that was used helped to pick the colors of Copic markers that would color Pumpkin Head and his friends.

Coloring Pumpkin Head

A swatch book was used to choose the colors which came from Authentique's 'Harvest' 6"x 6" paper pad. Swatch books are made by coloring with each marker, usually, within the same color family. A small sample is colored and the name and number are written next to it. This aids in choosing the true color of the marker, not the color that is depicted on the cap. 


Using three colors for the first pumpkin, the darkest marker was used first. A quick 'flicking' motion was used to color the area that was not going to be touched by the light source. The medium colored marker was used with the same 'flicking' motion next to the dark marker. Some strokes were overlapped to blend but using the 'tip-to-tip' technique worked better for blending.


To do the “tip to tip” technique, touch the tip of the lighter colored marker to the tip of the darker color marker, thus combining the two colors to create a shade in between.  Use the combined color to go over the area where the two colors join on the image.  Repeat this process until the image colors are blended as desired.  This method creates a less harsh blending of colors and does not damage the tips.  It may also be used to substitute for a color marker you may not have.


The stem of Pumpkin Head was colored using YG93 and YG97, blended as needed.  Marker E93 was applied for the nose and tongue and roof of the mouth.  Marker E44 was used for the inside of the mouth.  For the Iris of the eyes, YG93 was used and then C00 on the eyeball to accent the white color in the eye.  This finishes the first pumpkin!


The Rest of the Gang

Color combinations in sets of 3, using a combination of dark, mid, and light tone for each image, works best for blending.  Nine pumpkins of varying sizes using the color combinations shown in the photo were created, adding the same accent colors from the first pumpkin for the stem and facial features.


They were fussy cut cutting along the black line of the image using Fiskars Cutter Bee scissors. Copic marker N8 was used to go over the outside edge of each image, covering the white edge of the cardstock.  


Putting It All Together

A brown sheet of cardstock was cut to 5 1/2" X 8" 1/2 and scored on the 8 1/2” side at 2 1/8” and 4 1/4”. It was then folded on the score lines to form an easel card base.  

The following pieces for the card topper were cut as follows:
Brown cardstock 4 1/4” X 5 1/2”
Green cardstock 4 1/8” X 5 3/8”
The designer paper was cut at 4” X 5 1/4”.  The corners were rounded with a Creative Memories corner rounding punch.  
These three pieces were put together to form the card topper.


The following was cut for the inside of the card:

Green Cardstock 5 1/4” X 4”
White cardstock 3 3/4” X 5”
The two pieces were glued together and put them on the inside of the brown card base that is NOT scored.  This will create an area inside the card for a sentiment or message.

The card was laid with the inside face down. This formed the front of the card. Glue was added to the lower 2 1/8” section of the card front. With the edges matched, the top of the card topper was adhered with the designer paper facing up. 

The pumpkin friends and Pumpkin Head were laid out on the card topper forming a pyramid. Starting with the bottom row, three pumpkins were adhered. The two on the outside were attached with a tape runner, Pumpkin Head in the center is attached using double-sided foam tape for dimension. The pumpkin stems were left glued to allow the next layer of pumpkins to be tucked underneath. 

On the second row, the inside edges of each pumpkin (towards the center of the card) were attached with the double-sided foam tape. The outside edges of the second row of pumpkins were attached using the tape runner. This allows you to “stack” the pumpkins.  The top pumpkin was attached using double-sided foam tape.


The Grande Finale

Double-sided foam tape was used to adhere one of the remaining pumpkins to the inside bottom edge of the card. This is the stand to form the easel.  As a finishing touch, Glossy Accents was added on the pumpkin's facial features to bring them to life!


Ranger Glossy Accents 


It was a creative idea to make duplicate Pumpkin Heads in varying sizes, to make a stack on the front of the card! It looks cute and very festive!

There are many digital stamps (digis) available in the Koala T Crafts store at koalatcrafts.comhttps://www.koalatcrafts.com/store.html. Check them out! I am sure you'll find one that will be perfect for your next card!

You are personally invited to watch Koala T Crafts LIVE on the YouTube Channel on Wednesday for One in Ten by Jen: from Mailbox to Masterpiece at 5 pm CST. This program is so popular! Viewers enjoy and get a chance to participate! Not only can you chat with the community and Jen but you can send in your scraps and Jen will attempt to make you a card in 10 minutes! She DARES you to stump her!

Then on Fridays at 5 pm CST Koala T Crafts presents Friday Free Play with Jen LIVE! She shows crafting tips and tricks as well as teaching techniques. Viewers can offer ideas and sometimes the show goes a different direction than planned. That's what Free Play is all about!! Having fun while crafting!

Then on every other Saturday from 10 am-2 pm, Koala T Crafts has been offering a Garage Sale for the Facebook Community and the Public!! This too is a LIVE event! You will find discounted prices on tools, stamps, embellishments, markers, Tim Holtz, Stampin´ Up, Close To My Heart, Jolees, Fiskars, and so much more! If you ever have any questions about the events:

 Koala T Crafts


Wait! There's MORE!

Patrons have had the chance to get specials or preview sales on the Friday evening before the Garage Sale. After Friday Free Play at 6 pm CST, Patrons, only on the Patron Facebook page, get to view and participate. 

How can you get into this sale? It's oh, so easy! Becoming a Patron means making a monthly, or one time pledge, for as little as a $1.00. You are able to access special videos, additional swaps and challenges like the Envelope Challenge, Sketch Challenge, and receive free monthly digital stamps!  Just come in your pajama pants, hang out, bring a friend and have fun! Your support helps Jen continue her tutorials! It's easy to sign up with Patreon!


As always, thank you so very much for the continued support of the Jen Evers YouTube Channel! She has hit over 15,000 subscribers! Thank you for supporting and caring about the Koala T Crafts Facebook Group, Patreon Group, and the Blog! Please remember that you can always ask questions;
1. On the Facebook page, many in the Community are willing to help you out! 
2.  Private Message (PM) Jen Evers (Admin.) or Penny Jo Ratcliff (Admin.), Lori Ellen (Blog), Pamela Wilber (Card Swaps) or Susan Baker (Moderator)
3.  If you are a Patron of Koala T Crafts, you can post your question and the Patron Community will help happily! 
4.  Jen Evers is always available at her email address:koalatcrafts@gmail.com.


Remember, great things happen to
 those that create!

Artistically Yours,