FOLLOW ME HERE!

Tuesday, August 28, 2018

Stamping Platforms! How to use them and how are they different?

Beginner Stamping III: The Right Position

 Alright students, today we will be looking at a set of tools that will assist us in our stamping journey! These tools are very similar and all are meant to;

1. help stamp straight sentiments
2. make layered stamping easier 
3. multiple stamping like Christmas or Thank You cards simpler
4. stamped images can be stamped over if they are not clear the first time and 
5. there are cleaner images, without rocking a block


The names, who presented the tool, the year they were released to the public, the size and accessories are as follows;


Misti 

(Most Incredible Stamp Tool Invented) by My Sweet Petunia was first introduced to the public in 2015. 


Misti Stamp Tool Original Size Stamp Positioner


The original size has a stamping area of 8.5"x 6.5", laser etched grid lines on the acrylic lid, ruler on three sides, paper with grid lines, foam mat to allow for clear and rubber stamps and two very strong *neodymium magnets. 
MISTI Mini 6"x 4.75"


Since the release, the Misti has been expanded to two other sizes, Mini has a stamping area of 6"x 4.75", the Large Misti has a 12.5"x 12.5" platform for stamping. 

There is replacement grid paper as well as magnets and corners to help stamp smaller projects. This year My Sweet Petunia came out with protective cover/carrying case for the Regular and Mini Misti.


Studio Bag Pink


Stamp Perfect Tool 

By Hampton Arts was released in early 2016.
Hampton Art Stamp Perfect Tool
It's stamping area was 7.37"x 5.5". The tool included a grid on its acrylic lid, a mat for use of cling and rubber stamps and two magnets. There were measurements down three sides of the tool. Since the patent of the MISTI was released in 2017, the STAMP PERFECT TOOL was pulled off shelves in the U.S., claiming infringement recall as of March 2017.


Precision Press

By WRMK (We Are Memory Keepers) was released in late 2017. 

We R Memory Keepers Precision Press 


It's stamping area was 7"x 7", had a grid printed in its acrylic lid, with measurements down three sides and open on the sides to allow for a larger paper. It did not have magnets because the base was not magnetic. The metal hinges readjusted to the thickness of the stamp being used. Soon after it's release, it was pulled from the shelves and improved. At Creativation in January 2018, WRMK released the 'Advanced' version.


Precision Press Advanced

This new platform has a stamp area of 7"x 7" but has open edges to accommodate 12"x 12" paper. It now has pegs instead of hinges. The lid now becomes an acrylic block that comes off and back on in exactly the same position allowing for perfect restamping. The holes for the pegs are located along each side allowing you to turn the block in any direction as well as turn it over. 


The acrylic block can also be used separately from the system as a stamping block! It has four rubber feet to help keep an even pressure. Replacement blocks can be purchased to make layered stamping easier! 


We R Memory Keepers Acrylic Block 

Precision Press, Clear


A foam pad and two strong *magnets are included to hold down your cardstock. You'll find that the platform can be sold separately.

We R Memory Precision Press Advanced


Stamparatus

From Stampin' Up was released to the public in March 2018. It has a gridded base that has a stamping area 7"x 7". It has a foam mat to make it compatible with rubber and clear stamps.


Stamparatus Stamp Tool,
stamp foam, and magnets

It has rulers on two sides and the other two are open to accommodate larger pieces of paper. There are two re-positional plates which give you multiple sides to stamp with! There is two very strong bar *magnets included which are stored on the bottom.


Tim Holtz Stamp Platform

Ever since the presentation of the TH Stamp Platform at Creativation 2018 in January, the crafting world has been eager to get their hands on it! 

Tonic Studios - Tim Holtz - Stamp Platform

It has a gridded sturdy base that has measurements including metric on two sides. The other two sides are open to accommodate 12"x 12" paper. The Platform has an 8.5"x 8.5" stamping area.

What makes this tool so unique is the lack of hinges. The lid has solid plastic pieces that pivot around a metal rod! One side is to be used for clear stamps and the other side for rubber stamps. The lid is clearly marked which side is to be used. 

A Travel Size Stamp Platform has become portable! Despite its small size it still has a stamping area of 6.5"x 6.5"! It has all the features of its big brother but has two smaller strong *magnets.


Tonic Tim Holtz Travel Platform


Recently, a neoprene sleeve has become available for the regular and travel size TH Stamp Platforms!


TONIC STUDIOS Tim Holtz Platform Sleeve


What a lot of information! I hope you took notes for there will be a test this week! (Just kidding!!) I tried to be informative and stay neutral, not declaring my favorite or which ones I happen to own!


As always, thank you so very much for the support of the Jen Evers Youtube Channel! She has hit over 15,000 subscribers! Thank you for supporting and caring about the Koala T Crafts Facebook Group, Patreon Group, and the Blog! Please remember that you can always ask questions;
1. On the Facebook page, many in the Community are willing to help you out! 
2.  Private Message (PM) Jen Evers (Admin.) or Penny Jo Ratcliff (Admin.), Lori Ellen (Blog), Pamela Wilber (Card Swaps) or Susan Baker (Moderator)
3.  If you are a Patron of Koala T Crafts, you can post your question and the Patron Community will help happily! 
4.  Jen Evers is always available at her email address: koalatcrafts@gmail.com 

Becoming a Patron is so easy and fun!


What is a Patron?


When you make a monthly, or one-time pledge, for as little as a $1.00, you are able to access special videos, additional swaps and challenges like the Envelope Challenge, Sketch Challenge, receive free monthly digital stamps and get a free preview of the crafty items that will be for sale at Koala T Crafts bi-weekly Garage Sales. Just come in your pajamas, hang out and have fun! Your support helps Jen continue her tutorials! Sign up with Patreon!


I would love for you to leave comments below for me!
Remember, great things happen to those that create!
Artistically yours,
Koala T Crafts Original Store


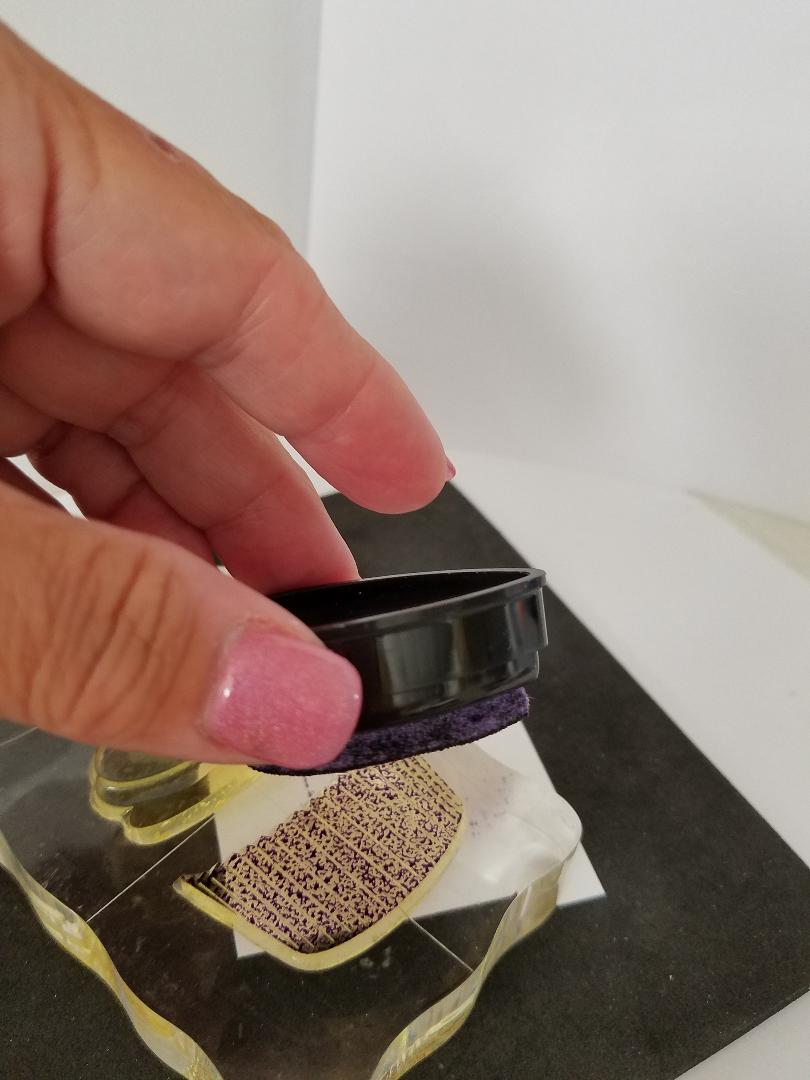
*NOTE: Neodymium magnets are very brittle and very strong magnetically. Keep away from children. Handle the magnets with extreme care to avoid personal injury and damage to the magnets. Fingers can be severely pinched between attracting magnets. Magnets can chip and/or break easily.

Many, many Thanks to the following websites:
Scrapbook.com
www.mysweetpetunia.com/default.asp
www.amazon.com
www.etsy.com/shop/KathysCozies?ref=shop_sugg
Splitcoast Stampers
www.youtube.com/watch?v=jpi4aW8FBLo
www.stampinup.com/ecweb/product/146276/stamparatus
www.tonic-studios.com


Friday, August 24, 2018

STAMP SCHOOL 101

Beginner Stamping II: Leaving an Impression

This time we will explore the different ways to use the stamps you have!


Pushin' It

Making good contact between the stamp and paper isn't always easy. Larger stamps sometimes leave sections missed and small sentiments can rock and wiggle. Using a foam pad will help with this. 

Sizzix Accessory Mini Stamper Secret Weapon

For clear stamps, this foam pad helps to create perfect images. Just put it under your paper and it will cradle the stamp when you use it.

It cushions the stamp making sure there is even, solid contact. Most often wooden stamps already have a foam cushion between the stamp and block of wood. Even though there is this foam, extra cushion does not hurt. 


The cushion between stamp and wood block


Straighten Up!

Now you have to put a sentiment under your image. I am sure you tried hard to have the stamp straight and completely stamped. How do you keep the stamp straight? Either you are really good at centering things, straightening and lining them up or you need some help from the Stamp-A-Ma-Jig!

Celebrate with us!
That's right, its purpose is to aid the crafter in positioning a wood-based rubber stamp.


Inkadinkado Stamp-A-Ma-Jig Stamp Positioner


Watch 'What is a Stamp-a-ma-Jig with me!


That wasn't too difficult, was it?  But what about other stamps? There are rubber stamps that are not mounted on wood. Some have the cushion and a few don't have anything but the rubber stamp.  Those issues will be addressed in another class! However, the stamp may cling to an...

Acrylic Block!

Acrylic blocks are a rectangle, round or square and are transparent! You can SEE RIGHT THROUGH THEM!


Krystal Acrylic Block Set Of 5


You may have some stamps that are clear and, you guessed it, using these blocks to put your stamp on will enable you to place the stamp in the position you would like! All you have to do is take a peek!

Beautiful Day Stamps by Simon Says Stamp


For this image, I used Memento, Tuxedo Black Ink, and Versafine, Onyx Black.


Tsukineko VersaFine Pigment Ink, Onyx Black


If you have a surface you work on that has grids, there is also a set of acrylic blocks that have grids. 

4 Pieces Stamp Blocks with Grid and Grip, Acrylic Clear Stamping Blocks 

Ink 'em Up!

I did a blog a while back on different types of ink so I don't want to be repetitive. Basically, the most popular types of ink are dye and pigment. Here's a link to that blog!
Ink 101-Helpful Comparisons

An example of a dye ink would be the popular Distress Inks. They are water soluble. They are great for solid or layered stamping. They dry quickly but aren't suitable for water coloring for they will smudge.


Pigment inks are permanent when they dry and take longer to dry than dye ink. Pigment inks have the ability to let you watercolor and use alcohol markers, like  Copic, Spectrum Noir or Ohuhu. The image does not change. Pigment inks are also great for heat embossing. 


Copic Classic Markers 36-Piece Basic Set


Spectrum Noir Alcohol Markers

Ohuhu Alcohol Markers

Inking is as simple as you think it is. For wooden blocks or acrylic, you will want to hold the stamp and bring the pad to the stamp. This way you can make sure there is a solid, even coverage and there will be little chance of the ink getting on your blocks.


Touch the stamp with the pad firmly but no need to do chest compressions! Make sure the stamp is covered thoroughly. Stamping over the original image is a risky business if your image is too light or missing in a spot.

Make sure you have your stamp mat under your paper. Use your Stamp-a-ma-Jig if you need to. You know, it could be used with the acrylic block also!

There are always exceptions...

Small, tiny stamps like bumble bees, hearts, stars and flowers, similar to the ones in the set below... 


  • Stamps
  • >
  • Hampton Art Life with you is Good


...should be taken to the pad. Careful to give even coverage to the whole stamp.


Stamp to Ink Pad then stamping

Background stamps are an exception. Picking them up can be awkward and ink-tense! They can just lie there while we ink it up well!


Hero Arts Mounted Rubber Stamps, 4.5 by 5.75-Inch, Designer Woodgrain

Lay your cardstock on top of your inked background. Lay another piece of cardstock on top of that, hold it steady with your fingers and firmly smooth across the surface of the paper. Be extra careful not to shift it as you remove one and then the stamped cardstock. Your image should turn out beautiful!


That's it!

Now, you can use those stamps you have been dying to try! Give yourself some room for oopsies! Be kind to yourself. I still smudge ink occasionally or double stamp because my hand bounced. It happens and it's only paper.

A very wise crafter once told me "Just turn the paper over." Wow!

Cleaning 101

Let's go through cleaning your stamps really quick.

Most of the time a baby wipe can be used to clean off the majority of the ink. The wipes have a small amount of lanolin in them and this keeps the stamps soft. Baby wipes also have very little alcohol in them. The alcohol can dry out your stamps. Rubber stamps can actually turn white and crack. 

HINT: More expensive wipes tend to leave more lint on them.

The quickest and easiest way to clean your acrylic stamps is with warm water and a mild soap. For really stubborn ink, you can also take a soft, old toothbrush and gently scrub the crevices in the image.

HINT: Do not use soap and water with wood-mounted rubber stamps, because it will loosen the adhesive. The quickest and easiest way to clean your wood stamps is with alcohol-free and aloe-free baby wipes.

HINT:  Some ink pads can stain your stamps. StazOn®, for example, really does stay on. That’s no big deal—just clean off what you can and let the stamp dry. It won’t ruin your stamp it may just stain it. 

Remember to keep your stamp TOOLS clean so you are not transferring ink from one stamp to another stamp or onto your project. 

This project has been interesting. I have been stamping for over 20 years and I still learned a few things as I wrote this. One never stops learning.

Watch with me as Jen goes LIVE on Wednesdays at 5:00PM CST for One in Ten by Jen: Card InJENuity from mailbox to masterpiece! where the viewers send in their scraps and challenge Jen to create a card in less than 10 minutes, timed!

Thank you so very much for the support of the Jen Evers Youtube Channel! She has hit over 15,000 subscribers! Thank you for supporting and caring about the Koala T Crafts Facebook Group, Patreon Group, and the Blog! Please remember that you can always ask questions;
1. On the Facebook page, many in the Community are willing to help you out! 
2.  Private Message (PM) Jen Evers (Admin.) or Penny Jo Ratcliff (Admin.), Lori Ellen (Blog), Pamela Wilber (Card Swaps) or Susan Baker (Moderator)
3.  If you are a Patron of Koala T Crafts, you can post your question and the Patron Community will help happily! 
4.  Jen Evers is always available at her email address: koalatcrafts@gmail.com 

Becoming a Patron is so easy and fun!


What is a Patron?


When you make a monthly, or one-time pledge, for as little as a $1.00, you are able to access special videos, additional swaps and challenges like the Envelope Challenge, Sketch Challenge, receive free monthly digital stamps and get a free preview of the crafty items that will be for sale at Koala T Crafts bi-weekly Garage Sales. Just come in your pajamas, hang out and have fun! Your support helps Jen continue her tutorials! Sign up with Patreon!


Remember, great things happen to those that create!
Artistically yours, 


Picture
Shop Koala T Crafts Store


Friday, August 10, 2018

FOR THOSE TIM HOLTZ LOVERS!

Tim Did It Again!

Yes, it's quickly becoming that time of year when the children are off to school, there's a crispness in the air, bright colors in the forests of Wisconsin and it's HALLOWEEN at Stampers Anonymous! Officially on 8/8/18, the Halloween line started shipping out. (How cool is that?)


Tim Holtz presents Stampers Anonymous Halloween!

Stampers Anonymous

Stampers Anonymous is an American based company located in Cleveland, Ohio. You might already own some items for Halloween but I can assure you, they are NOT like these! What is really, really cool is the fact that they will never, ever retire one of Tim's products! So if you liked the witch that came out last year, they have it. Or if you liked the chandelier or leaves from 5 years ago, they have it! 

One thing that was explained about the stamps was the difference whether a sheet of stamps was 'weeded' or not. They give you the whole sheet of rubber with some stamps because of their size. If they are small, it is easier to store them if you pop them back into place.

New Stamps

For example, the new stamp set called Natures Wonder has the whole sheet to hold the several different leaves and sentiments.

So many beautiful stamps in Natures Wonder

Backgrounds


Tim loves his backgrounds and this release is no different. 

One of his new backgrounds mimics the crazing texture that naturally happens in old china and pottery. At times you can hear the ping of the fired glaze cracking. The companion to the set of Crazing and Planks is, you guessed it, planks! The uniqueness of this stamp is the image of the planks goes the short way instead of the long way like so many others do. Tim continues his great detail in both of these stamps!

Background stamp Crazing and Stamps

Tim also wanted something that was detailed but turned out gorgeous when embossed! Sometimes the image of the stamp gets lost when embossing powder melts on the paper. Ornate and Lace were created with that in mind. The detail stays when embossed, leaving the image clear and ready to be blended. 

Ornate and Lace have a perfect tattered look about them


These background stamps are so versatile, they can be used all year long. Imagine the tattered Lace embossed in gold on a Christmas card or for Valentines!

Creepiest Images


The cocky looking gentleman with the tilted top hat and leering grin is none other than Mr. Bones. He is the perfect example of a stamp set that is weeded.

Mr. Bones is welcoming you to
the Halloween collection!


How many stamps of spider webs does one person need? Well, you'll need this one! Tim compares the different stamps of spider webs he has done over the past 5 years or so. Each year he put out a stamp of a web that was different and a little better than the year before.  

ss
Comparing his own evolved webs

This year, Tangled Webs, is like none other! The thin detailed lines are authentic enough to be used in the foreground as well as the back! The favorite is the corner web. It looks just like its been bothered by the wind, a leaf or even yourself as you walk by! How spooktacular is that? It's truly the look we go for when we drape the fake web at Halloween through our bushes, trees, and doorways!

Notice the difference in Tangled Webs?

An eerie addition to the ever-popular Inventor Series is Inventor 4! Something is so fascinating about the measurements and schematic of the images in this stamp. 

Goosebumps about Inventor 4

The next images of Spooky Scribbles are not his original work but he has licensed them as his own. They remind him of his favorite childhood icons but he couldn't help but add, of course, a little bit of GRUNGE!

Notice the trademark grunge look of Spooky Scribbles?

This will be the final stamp set in this series and it echoes a popular trend. Zombies is exactly what it implies. Icky, gooey, weird, messed up bits and parts of people that are NOT people! Know what I mean?

Zombies is a good name for this stamp set

Again, these were shipped out to the stores on Wednesday, 8/8/18. Watch for them to start appearing. Some of your favorite online shops may be taking pre-orders for them. Sometimes waiting a bit longer, you can find better prices on Blitsy, Scrapbook.com or even Amazon! Watch for possible announcements of these sales on the Koala T Crafts Facebook and Patron Pages!!

Stencils too

Yes, there are stencils included in this new release. At first glance, they look like many of the other stencils on the market, stripes, polka dots and harlequin. 

Very common looking stencils

When have you ever known Tim Holtz to be ordinary? Along with a set of minis, like his other stamp sets, he has created stencils that look quite basic.

At a closer look, they are very unique because they have the same sketched pattern right next to them. They are called Shifters and Tim does an amazing job showing you how to make these stencils create awesome holiday backgrounds!

Shifters in action!

Original Size

Why not include a mask in the stencil? In the demonstration, Tim uses Black Soot Distress paint to bring out the mask outlines. Once the paint dries it becomes permanent and nothing added to it will wipe it away, not sprays, stains, inks or oxides!  Wait until you see the sample Tammy B. did for Tim. She took it to a whole another level!

Read the blog for close up pictures of each of the sets for the Halloween release at Stampers Anonymous. 


This will take you to Tim Holtz's blog


I urge you to watch the video as Tim tells you so much more about each item. He shows you how to use his new stencils too. The picture below will take you to the video!

Link to watch the video

If you follow my blogs (and my purchases at the Garage Sales!) you should know how I adore Tim Holtz's grunge approach to things. It adds that little aged look to my favorite vintage style of creating!

Tim is smiling at me!


HINT: September will be the Stampers Anonymous AND Idea-ology Christmas release!

I wish I had more links to information and purchasing for you this time! I was so excited about this I just had to share! I hope this puts you in the mood to start your Halloween projects!

Watch Jen LIVE on Wednesdays at 5:00PM CST for One in Ten by Jen: Card InJENuity from mailbox to masterpiece! where the viewers send in their scraps and challenge Jen to create a card in less than 10 minutes, timed! 

On Fridays, watch Friday Free Play LIVE on Jen's YouTube Channel. Tutorials, techniques, and tips are shared in this hour-long video. Share the fun with your friends!

Hope you'll join us for extra videos as one of the perks of being a Patron.


What is a Patreon?

When you make a monthly, or one-time pledge, for as little as a $1.00, you are able to access special videos, additional swaps and challenges like the Envelope Challenge, receive free monthly digital stamps and just hang out and have fun! Your support helps Jen continue her tutorials! Sign up with Patreon!

Remember, great things happen to those that create!
Artistically Yours,


Koala T Crafts Original Store