
What the Heck is a Vignette?
Vignette (vin-yet)
~noun
1. a decorative design/illustration used on the title page of a book/chapter
2. engraving, drawing, photograph shaded off at edges to leave no border
3. small pleasing picture
4. small literary sketch
5. a form of diorama
The word vignette originated in 1751 and at that time meant tendrils around the borders of a book page, from the French word Vigne "vineyard". It became very popular in the mid-19c. It became known as a decorated small photographic picture first recorded in the 1880s!
Being asked what a vignette was and then given 'homework' to find out, I found the experience rather challenging and exciting! We should all stretch our horizons once in a while and reach out of our comfort zones! Joining in on some of the card swaps in Koala T Crafts Facebook Group is a good way to start!
 |
| Koala T Crafts Facebook Page |
Dusting off the memories that go back to my mixed media and minialbum days, I set out to create a new item, a vignette. After doing some research, I decided on a theme, butterflies. I really wanted to use Susan Winget's Cardstock and Acetate Die Cuts. I knew I wanted it to look vintage as if it was from the late 1800's but I wanted it to stay pastel and feminine.
 |
| The selection I made for my first vignette! |
 |
| Tim Holtz Idea-Ology Wooden Vignette Boxes |
 |
K&Company Susan Winget Die-Cut Cardstock and Acetate, Botanical |
First Things First
To do the embossing technique I wanted on the inside, I knew it would have to sit a while to dry. Wanting to have some of the natural stain and wood grain come through, vellum was chosen to line the inside of the vignette box.
 |
| Tim Holtz Wallflower Paper Stash-Vellum 12x12 |
 |
| Using Tim Holtz Design Ruler to measure inside and outside of the box. |
 |
| I decided to put vellum on the back of the box also. |
 |
| Design Ruler by Tim Holtz Idea-ology, 12 Inch, Plastic and Metal, Clear |
Worn Wallpaper by Tim Holtz was going to be placed on the sides and front of the largest box.
I found some teal paper that matched the Worn Wallpaper in my stash. This paper I die cut twice with a decorative corner from the mixed media thinlet die set.
 |
| This paper I used to die cut a decorative corner with a mixed media thinlet twice. |
One of the die cuts was to be used as a stencil.
 |
| Sizzix Mixed Media #2 Thinlits Die Set by Tim Holtz |
WOW! embossing powder in platinum was chosen as the color to compliment the vellum which would be placed in the back of the vignette. It was mixed with Ranger's Embossing Paste. The paste was spread over the stencil. The stencil was lifted and a beautiful dimensional effect was left to dry!
 |
| One of the cuts was used as a stencil for the vellum that went on the inside back of the box. |
 |
Wow! Embossing Powder Super FineMetallic Bundle: Gold, Silver, Platinum, and Copper |
 |
| Ranger Texture Paste Transparent Matte |
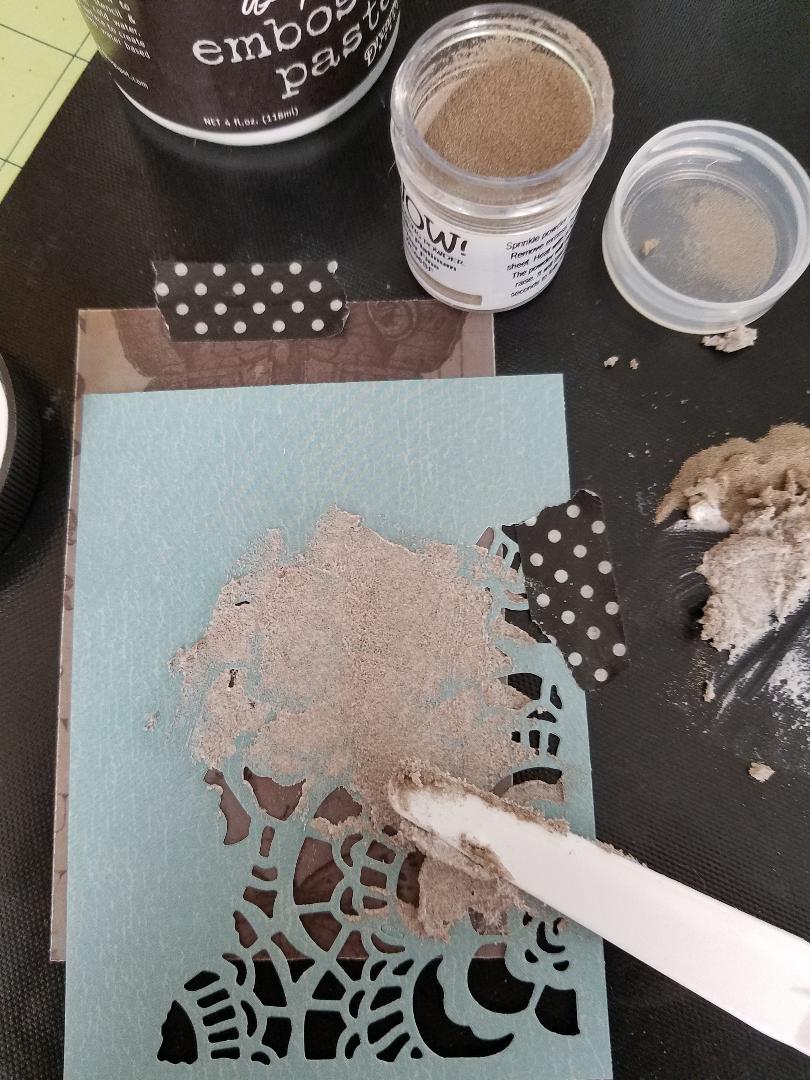 |
| Using the stencil, the paste was spread across the vellum. |
 |
| When it dried overnight, it had a velvet-like look to the raised florals! |
The next day...
All the paper pieces were distressed with the edge of a Cutter B Scissors and Momento Espresso Dye Ink.
 |
| Worn Wallpaper was used on the rest of the box. |
 |
| EK Success Cutter Bee Precision Scissors |
 |
| Tim Holtz Idea-ology Worn Wallpaper |
 |
| Distressed edges of the paper and die cuts |

 |
| Platinum flower by Spare Parts Paper Studio and Susan Winget's Die Cuts were added |
 |
| Distressed Die cut added to inside of the box |
 |
Prima Marketing Sunrise Sunset Mechanicals Metal Vintage Trinkets-Flowers Small |
After carefully deciding, E6000 was used to attach the metal embellishments to the vignette. (ATTENTION: The fumes from this glue are harmful! It should be used in a well-ventilated area!)
 |
| Adding metal embellishments |
 |
Brand New Idea-Ology Curio Knobs |
 |
Tim Holtz Idea-ology Hinges |
 |
| Nature Adornments by Tim Holtz Idea-ology, 6 Charms per Pack, Various Sizes, Antique Nickel Finish |
 |
| E6000 Adhesive with Precision Tips |
Finishing Touches
With the back and sides satisfactory, I moved on to finish the inside. Wanting the vignette to be a card, of sorts, I wanted a sentiment and a space to write a note if one wished.
I found the letters F, L, and Y in my stash distressed them and added them to the inside back bottom. I created a journaling spot by layering papers, rounding corners, adding die cut butterflies. A sweet sentiment in the upper right-hand corner read, "the world is a little happier with you in it"!
Just one little thing was needed to the inside bottom. I wanted it to have some dimension but also fit with the theme of the vignette. I found a word band in my stash that had the perfect words "possibility begins with imagination"!
 |
Tim Holtz Idea-ology Metal Word Bands |
The Reveal
Here are the pictures of the sides and back of my first vignette!
 |
| The right side with metal rose and butterfly |
 |
| The left side with hollyhocks and hinges |
|
| The back with floral vellum, distressed die cut corner, distressed Susan Winget die cut and metal flower adornment |
 |
| Front with hinges, curio knob, and raised die cut |
As you can see in the pictures, one more item was added to my mini masterpiece! It was the vignette bottom that was given to me. I was to find out what it was and use it!
 |
| The finished project! |
Mission accomplished!! What a fun and challenging three days or more, making decisions and feeling so much gratitude for having the items available to me.
A great many of the items I have used came from Koala T Craft's Garage Sales. They have been on occasional Saturdays and are LIVE on Jen Evers' YouTube Channel.
Watch for ads and posts for dates and times on the Facebook community page and the Patron group!
Also watch Jen LIVE on Wednesdays at 5:00PM CST for One in Ten by Jen: Card InJENuity from mailbox to masterpiece! where the viewers send in their scraps and challenge Jen to create a card in less than 10 minutes, timed!
On Fridays, watch Friday Free Play LIVE on Jen's YouTube Channel. Tutorials, techniques, and tips are shared in this hour-long video. Share the fun with your friends!
Hope you'll join us for extra videos as one of the perks of being a Patron.
What is a Patreon?
When you make a monthly, or one-time pledge, for as little as a $1.00, you are able to access special videos, additional swaps and challenges like the Envelope Challenge, receive free monthly digital stamps and just hang out and have fun! Your support helps Jen continue her tutorials! Sign up with Patreon!
Remember, great things happen to those that create!
Artistically Yours,
Artistically Yours,


 |
| Koala T Crafts Original Store |
Thank you so very much for the support of the Koala T Crafts Youtube Channel, Facebook Group, Patreon Group, and the Blog! Please remember that you can always ask questions;
1. On the Facebook page, many in the Community are willing to help you out!
2. Private Message (PM) Jen Evers (Admin.) or Penny Jo Ratcliff (Admin.), Pamela Wilber (Card Swaps) or Susan Baker (Moderator)
3. If you are a Patron of Koala T Crafts, you can post your question and the Patron Community will help happily!
4. Jen Evers is always available at her email address: koalatcrafts@gmail.com
Love this box, it's sooooo pretty. You did an amazing job!
ReplyDeleteThank you for the step by step, very helpful. Love the whole look.
ReplyDeleteWow, awesome blog, Tons of info. Tyvm for sharing all this.It looks great, and there are tons of tips i have learned. I love seeing new and old product too, That is such a huge help and you explain everything thoroughly. thanks again!
ReplyDelete